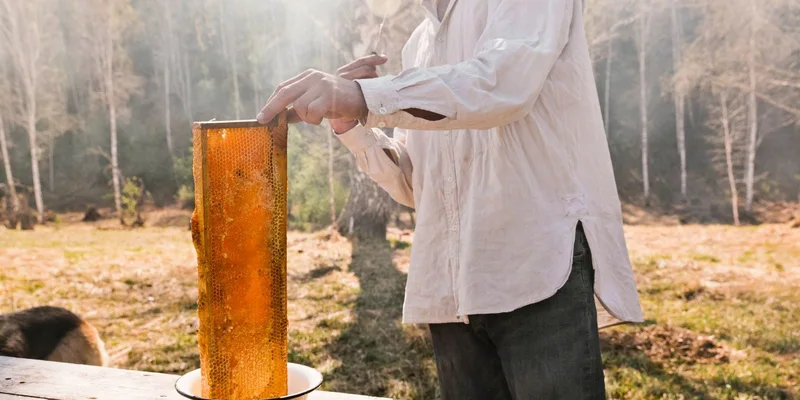
Last updated: August 21, 2026
Harvest day goes wrong in a predictable order. The bees will not leave the super, the knife is not hot, the extractor gate is over the wrong bucket, and somewhere in the middle of all that a five gallon pail of honey is standing on a chair because there is nowhere else to put it. None of these are equipment failures. They are sequencing failures, and every one of them is avoidable the day before.
This guide lays the harvest out as a running order rather than a shopping list, because what you need depends on which step you are standing at. Clearing the bees, getting the supers indoors, uncapping, spinning, straining, settling and bottling each have one or two pieces of gear that make them work, and knowing the order tells you what you can skip.
This article contains affiliate links. If you buy through them, we may earn a commission at no extra cost to you. Learn more.
Quick Answer
What equipment do you actually need to harvest honey?
- Non negotiable: a way to clear bees off the super, something to uncap with, something to catch cappings, a strainer and a food grade bucket with a gate.
- Worth having: an extractor, so drawn comb goes back on the hive instead of being crushed.
- Situational: a refractometer, a fume board, a cappings spinner, a warming setup for cold honey.
- Set the whole line up before you touch a hive. Everything that goes wrong on harvest day goes wrong because a step had nowhere to drain into.
Bottom line: buy for the step you are on, and lay the line out on the bench before the supers come off.
Step One: Getting the Bees Off
A full super comes off the hive covered in bees, and none of them want to leave. An escape board slid under the super the day before does the work for you: bees travel down into the brood chamber through a one way maze and cannot get back up, so the super is largely empty by morning without smoke, brushing or fuss.
The alternatives are a bee brush, which works frame by frame and annoys the colony, and a fume board, which clears a super in minutes using a repellent but is more equipment than a backyard apiary usually needs. For one to four hives, the escape board is the calm option.

Step Two: Carrying and Storing Supers
A full medium super is heavy and a full deep is heavier still, so plan the carry before you lift. Have a wheelbarrow or a hand truck at the hive, a covered tote or a spare lid and bottom board to close each super, and a route into the house that does not involve steps you cannot see over.
Supers waiting to be extracted need to be closed off from bees and kept warm. Warm honey spins out easily and cold honey does not, so a garage that has dropped overnight will slow the whole day down. Keeping them indoors also keeps small hive beetles and wax moths from finding an unattended stack of honey.
Step Three: Uncapping
Uncapping is the slow step, and the gear that shortens it is a blade long enough to cross the frame in one pass plus a fork for the low spots. A temperature controlled electric knife is the version most keepers settle on; a cold serrated blade and a pot of hot water is the version that costs almost nothing and still works.
Whichever blade you use, the cut wants to ride on the frame’s end bars so you shave the caps rather than carving comb. Our uncapping knife guide covers heat, blade length and the technique that keeps drawn comb intact for next season.

Catching the Cappings
Cappings come off wet with honey and have to land somewhere that lets that honey drain. An uncapping tank with an internal screen does it properly; a food grade bucket with a strainer sitting in the top and a bar across it for the frame does most of the same job for a small harvest.
What you must not do is uncap over a solid tray or a cookie sheet. The honey stays in the wax, the tray overflows, and you end up scraping a sticky mat into a bucket anyway. The uncapping tank guide covers the formats.
Step Four: Extracting
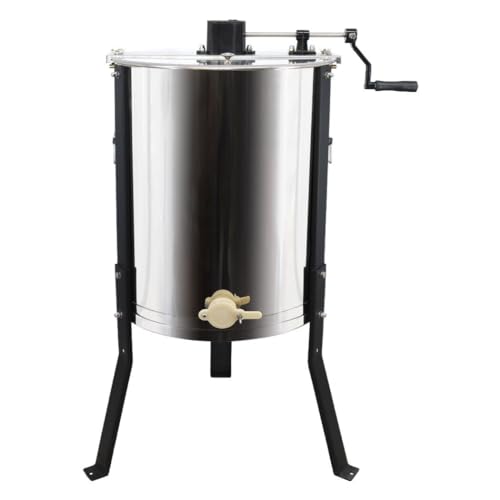
The extractor spins honey out of the cells and leaves the comb standing, which is the reason to own one at all. Drawn comb goes straight back on the hive and saves the colony an enormous amount of work next spring, whereas crushing and straining destroys it for a single harvest’s worth of convenience.
Size the drum to your frame depth first and your colony count second. Two to four frames covers most backyard apiaries, and the choice between a hand crank and a motor comes down to how many loads you are doing rather than how many hives you keep.
Step Five: Straining, Settling and Bottling
Honey out of the extractor gate carries wax flakes, the occasional bee part and fine debris, so it runs through a double sieve on its way into a food grade bucket. Coarse over fine is the combination that works; a single fine mesh clogs and needs clearing every few minutes.
Then leave it alone. A settled bucket pushes air bubbles and remaining wax specks to the surface over a day or two, where a sheet of plastic wrap laid on the surface and peeled off lifts the foam in one go. Bottling from a gate near the base of that bucket gives you clear honey instead of a jar with a cloudy cap.

Checking Moisture Before It Goes in Jars
If any frames went in only partly capped, a refractometer reading tells you whether the batch will keep. The moisture ceiling most keepers work to comes from the United States Standards for Grades of Extracted Honey published by the USDA Agricultural Marketing Service, which sets it at 18.6 percent for the top grades.
It is not a first harvest essential, and keepers taking fully capped frames in a dry climate manage without one for years. It becomes worth owning if you live somewhere humid, if you regularly pull partly capped frames, or if you give jars away and would rather not hear about a fermented one in six months.

The Kit in Running Order
| Step | What it needs | Skippable substitute | Where it goes wrong |
|---|---|---|---|
| Clearing bees | Escape board | Bee brush, frame by frame | Fitted the same morning, not the day before |
| Uncapping | Heated knife plus fork | Serrated blade and hot water | Blade shorter than the frame is deep |
| Catching cappings | Uncapping tank with screen | Bucket, sieve and a frame bar | A solid tray with no drainage |
| Extracting | Two to four frame drum | Crush and strain, comb lost | Gate too low to clear a bucket and sieve |
| Bottling | Double sieve and gated bucket | None worth having | Bottling before the honey has settled |
Setting Up the Room
Lay the line out left to right before a single super comes indoors: uncapping tank, extractor, strainer and bucket, jars. Every transfer you can do by sliding a frame sideways instead of carrying it across a room is honey that stays off the floor. Put something washable underneath everything, because the drips are not optional.
Close the room off from bees completely. An open window during extraction turns into a robbing situation within minutes, and once bees have found the room they keep coming back to it for days. Warm water, two cloths and a bowl on the bench handle the rest.
What to Do the Day After
Wet supers go back on the hives at dusk or well away from the apiary so the bees can clean them up, then come off again once they are dry and go into storage. Cappings get rinsed and rendered into wax rather than thrown out. The extractor gets rinsed warm, dried fully with the lid off, and put away dry.
None of this needs to happen on harvest day itself, and trying to do it all in one go is how people end up hating the process. Bottle the settled honey later in the week when the room is clean and the mess is somebody else’s memory.
Frequently Asked Questions
What is the minimum kit for a first harvest? A way to clear the bees, a serrated knife and a pot of hot water, a bucket with a sieve in it, and a second food grade bucket with a gate. Everything else on this page is an upgrade to that.
Can I harvest without an extractor? Yes. Crush and strain gets the honey out and costs almost nothing, at the price of destroying the comb. It is a perfectly reasonable route for a first harvest or a single super.
Does honey need to be heated before bottling? No. Honey flows more easily when it is warm, so keeping the room and the supers warm helps, but heating honey to make it pour is not necessary and does it no favors.
How long should honey settle before bottling? A day or two in a warm room is usually enough for bubbles and fine wax to rise. Skim or lift the foam off the top before you open the gate and the jars come out clear.
Do I need food grade buckets specifically? Yes. Anything holding honey for more than a few minutes should be sold as food grade, and that includes the gate fitting and the lid, not just the pail itself.
What do I do with the wet supers afterward? Let the bees clean them, either back on the hives at dusk or somewhere well away from the apiary, then store them dry. Wet supers put into storage attract pests and ferment.
The Bottom Line
Harvest gear is a sequence, not a shopping list. Clear the bees, get the supers indoors warm, uncap over something that drains, spin, strain into a gated bucket, let it settle, then bottle. Buy the piece that matches the step you are stuck at and skip the rest until it becomes the bottleneck. Start with the extractor guide if you are choosing a drum, and the uncapping knife guide if the bench is what slows you down. Before any of it, confirm the frames are ready using the capping and shake test.