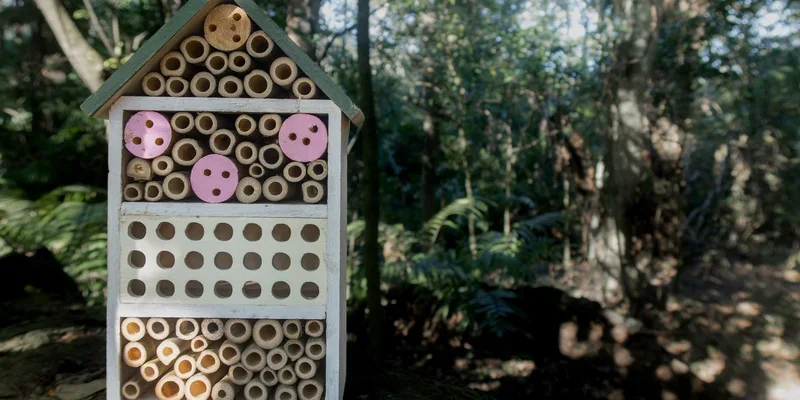
Last updated: August 21, 2026
A mason bee house is one of the few pieces of bee equipment that is genuinely better homemade, because the whole object is a box with a roof and the part that matters is what you slide inside it. Offcuts from a fence repair, a length of scrap cedar, four screws and an afternoon get you a house that outperforms most of what hangs in garden centers, as long as you build it around the nesting material rather than around the look.
This build takes the opposite approach from the usual weekend project: instead of drilling holes into a block of wood, you build an open-fronted box and fill it with tubes or trays you can remove. That one decision is what makes the difference between a house that raises bees for years and a decorative panel that quietly turns into a mite farm.
This article contains affiliate links. If you buy through them, we may earn a commission at no extra cost to you. Learn more.
Quick Answer
How do you build a mason bee house?
- Build a five-sided box with a solid back and an overhanging roof, sized so the nesting material sits about six inches deep.
- Fill it with removable tubes, liners or trays rather than drilling holes into the wood.
- Use untreated, unpainted wood on any surface the bees touch.
- Mount it firm and level facing the morning sun, sheltered from driving rain.
Bottom line: build the housing, buy or cut the tubes, and never make the nesting cavity part of the structure.
Design the Box Around the Tubes
Start from the nesting material and work outward. Oregon State University Extension points at cavities around 5/16 inch in diameter and roughly six inches long, closed at one end, for common spring mason bees. Your box therefore needs an internal depth of about six inches and an opening tall and wide enough to pack that material in snugly.
Everything else follows from that. The back panel is solid so the tunnels are dead ends and rain cannot blow through, the roof overhangs the front by an inch or two so water drips clear of the tube openings, and the front stays completely open so you can slide the whole bundle out in fall.
Why Not Just Drill the Wood
Drilled blocks are the most common homemade design and the least useful one. A hole in solid wood cannot be opened, so pollen mites, chalkbrood and parasitic wasps accumulate in it season after season, and the guidance for solitary bees consistently steers people toward material that can be inspected and replaced.
Drilled blocks also tend to be too shallow, since standard bits are shorter than six inches. That produces a mostly male population, and males do not nest the following year. If you already own a drilled block, the fastest upgrade is to treat it as a shell and pack tubes into the front instead.
Materials Worth Using
Untreated softwood is the standard choice. Cedar, pine, fir or spruce offcuts all work, and cedar earns its place because it handles weather without any finish. What you want to avoid is anything the bees will be sealed against for ten months: pressure treated lumber, plywood with exposed glue edges, and painted or varnished interior surfaces.
Finish the outside if you like the look, but keep paint and stain off the front face and off anything inside the box. Fasteners are your choice, though exterior screws let you take the roof off later, which is worth more than glue when you want to clear out an old nest or fix a leak.
Building It Step by Step
The whole build is five pieces of wood and a filling. Cut them from one scrap board of roughly six inch width and the depth takes care of itself. Work in this order so nothing has to be forced together at the end.
- Cut two side pieces about six inches deep and eight to ten inches tall.
- Cut a top and bottom to match the width you want, typically eight to twelve inches.
- Screw the four pieces into a rectangle, then add a solid back panel.
- Add the roof as a separate piece that overhangs the front and both sides, sloped back to front.
- Pack the cavity with tubes or trays until the bundle is snug enough not to shift in wind.
Making the Bundle Snug
Loose tubes rattle, slide forward and shed cocoons on the ground. Cut a thin filler strip or fold a piece of scrap cardboard to take up the last quarter inch of space so the whole bundle stays put. It should be tight enough to hold itself and loose enough that you can pull it out in October with one hand.
Set the tube openings back about half an inch from the front edge of the box rather than flush with it. That small recess gives the openings some shade and shelter and it makes it harder for a bird to reach straight in.
Filling It: Buy, Cut or Both
You have three practical options for the inside, and mixing them is fine. Cardboard tubes with tear-open paper liners are the easiest to harvest, cut reeds are close to free if you have phragmites or bamboo of the right diameter available, and stacked wooden trays are the format you graduate to if you keep doing this.
Cardboard refills are the shortcut, and they solve the depth problem for you since they are sold at the length the bees want.

If You Insist on Drilling Trays
Routed or drilled wooden trays that stack and come apart are the one wood-based cavity worth making, because the tunnel splits open along the seam between two trays. That needs a bit long enough to reach six inches, which is not the bit that came with your drill set.
A brad point bit in the right diameter and length gives a clean tunnel wall without tearing the grain, which matters because rough splinters snag cocoons on the way out.

Cut List and Key Dimensions
These are the numbers that decide whether the house works. Overall size is flexible, since a wider box just holds more tubes, but depth, diameter and overhang are not.
| Part | Rough size | Why it matters | Flexible? |
|---|---|---|---|
| Nesting cavity depth | About six inches | Shallow tunnels skew offspring male | No |
| Tube inner diameter | Around 5/16 inch | Matches common spring mason bees | No |
| Roof overhang | One to two inches past the face | Keeps rain out of tube openings | No |
| Box width and height | Eight to twelve inches | Only sets how many tubes fit | Yes |
Mounting the Finished House
Fix the house solidly to a wall, post or fence at roughly head height with the openings facing where the morning sun lands. Solid is the operative word: a house that swings on a hook in the wind gets skipped. Two screws through the back panel into a fence rail is all it takes.
Keep it out of the afternoon blast in hot regions and under an eave if you have one. And leave a patch of bare, damp clay soil within a short flight, because every cell wall in that house is mud a female carries there in her jaws.
Frequently Asked Questions
What size hole for a mason bee house? Around 5/16 inch in diameter and roughly six inches deep with a closed back, which is the combination Oregon State University Extension names for common spring mason bees. Mixed diameters mostly attract other insects.
What wood should I use for a mason bee house? Untreated softwood such as cedar, pine or fir. Avoid pressure treated lumber, and keep paint, stain and varnish off the front face and every interior surface.
Should I drill holes or use tubes? Use removable tubes or stacked trays. A drilled solid block cannot be opened or cleaned, which is how pollen mites and chalkbrood accumulate from one season to the next.
How big should the house be? Overall size is up to you. Depth, tube diameter and roof overhang are the fixed constraints; width and height only decide how many tubes the box holds.
Can I use bamboo from the garden? Yes if you can cut it so each piece is closed at one end by a node and the inner diameter is close to the target. Sand the cut ends smooth, since splinters snag emerging bees.
Do I need to take the house down in winter? Many people harvest the cocoons in fall and store the nesting material rather than leaving everything outside. That routine is also how you catch mites and mold early.
The Bottom Line
A homemade mason bee house is a weekend of scrap wood and a bundle of tubes, and it beats the store-bought version as soon as you make the cavity removable. Get the depth, the diameter and the roof overhang right and the rest is carpentry taste. Compare your build against the mason bee house buying guide before you cut, and read mason bee house problems so you know what you are looking at when you open it in October.