Last updated: August 21, 2026
Ask ten backyard beekeepers about insulating a beehive for winter and you will get ten answers, most of them shaped by whatever their mentor did. A lot of that disagreement disappears once you stop thinking about insulation as a way to keep bees warm and start thinking about it as a way to control where water ends up.
A wintering colony is a small, damp furnace. The cluster burns honey and produces both heat and water vapor, and that vapor has to go somewhere. Insulation decides whether it condenses on a cold lid and rains back onto the bees, or whether it moves out of the hive. This guide covers where the moisture goes and what to put above the cluster.
This article contains affiliate links. If you buy through them, we may earn a commission at no extra cost to you. Learn more.
Quick Answer
What is the best way to insulate a beehive for winter?
- Insulate the top first. The lid is where warm damp air meets a cold surface and turns back into water.
- Give the moisture a way out or something to soak into, with an upper vent, a quilt box, or both.
- Side insulation and wraps mainly buy you a windbreak and slower heat loss, which matters most in long, cold, exposed winters.
- Never seal a hive tight in the name of warmth. Dry and cold beats warm and wet every time.
Bottom line: a warm lid and a route for water vapor do more for a wintering colony than wrapping the sides of a hive that still drips on the cluster.
Cold Is Rarely What Kills a Backyard Colony
Honey bees do not heat the hive cavity. They heat the cluster, a tight ball of bees that shivers to keep its center livable and rotates individuals from the chilled outer shell inward. As long as they have food within reach and stay dry, a healthy colony handles temperatures that sound alarming to a beekeeper standing outside in a coat.
What they handle badly is water. Condensation dripping from a cold inner cover soaks bees that then cannot shiver effectively, and a damp box invites mold in the comb. When a deadout comes apart in March with a wet bottom board, moisture was almost always part of the story.
Where the Moisture Actually Goes
Follow the water. The cluster consumes honey, which is roughly a fifth water to begin with, and metabolizing it releases more. That warm, humid air rises to the top of the hive, hits the underside of the inner cover or lid, and condenses there because that surface is the coldest thing it touches. Then gravity takes over.
You have two ways to break that cycle. Warm the top surface enough that vapor no longer condenses on it, which is what top insulation does, or capture and release the vapor before it reaches a cold ceiling, which is what an absorbent quilt or an upper vent does. Most keepers in cold climates end up doing both.
Why Condensation on the Walls Is Different
Some experienced keepers deliberately leave the side walls uninsulated so condensation forms there instead, runs down the inside of the box and gives the colony a water source in midwinter, rather than dripping from directly overhead. That only works if the top stays warmer than the walls, which is the whole argument for insulating above the cluster first. It is also why sealing a hive completely backfires: humidity climbs until the coldest available surface takes it, and in a closed box that surface is often right above the bees.
Top Insulation: The Job Worth Doing First
If you do one thing, do this. A layer of rigid foam, a shim packed with absorbent material or a purpose built insulated cover sits above the inner cover and raises the temperature of the hive ceiling. Vapor then stays vapor long enough to find a vent instead of raining on the cluster.
Thickness is a regional judgment, and your county association will know what works locally. What matters more than the number is that the material is dry, fits the footprint of the box and does not block the upper entrance if you use one.
Best for a Keeper Who Wants One Part That Replaces the Cover
An insulated inner cover or telescoping lid with a built in foam layer does the job without a stack of loose pieces to store in spring.

Best for the Cheapest Effective Fix
A sheet of rigid foam board cut to the footprint of the hive body, held down by the telescoping lid, is the setup a great many backyard keepers actually run.

Quilt Boxes and Absorbent Layers
A quilt box is a shallow rim that sits above the inner cover, floored with breathable fabric and filled with wood shavings, burlap or similar material. Vapor rises into it, the shavings take up the water, and small upper vents in the rim let it dry out. The cluster stays dry and the ceiling above them is no longer a condensing surface.
The trade-off is maintenance. Shavings that stay saturated stop working and can freeze into a solid cap, so the material needs to be dry going in and worth checking on a mild day. Wet coastal winters favor quilts; dry cold often does fine on foam alone.
Best for Damp Winters and Coastal Yards
A quilt box with a breathable floor and vented sides handles a lot of water without asking the colony to give up heat through a wide open top.

Best for Keepers Who Want Ventilation Without a Full Quilt
A ventilated inner cover with screened upper openings gives the vapor an exit and doubles as a shim for solid winter feed above the frames.

Side Insulation and Wraps
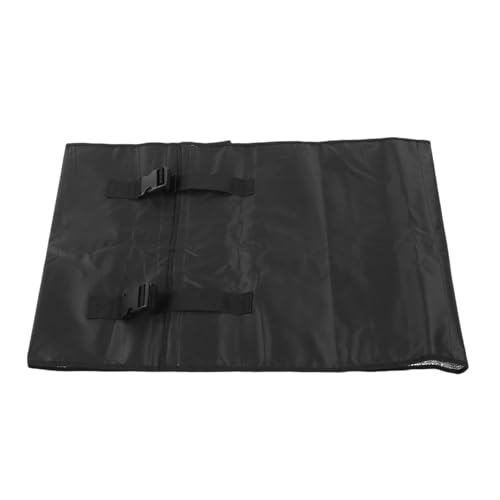
Wrapping the sides of a hive does something different from insulating the top. It cuts wind, which strips heat from a box faster than still cold air does, and it slows the overall rate of heat loss so the cluster burns fewer stores holding its temperature. In a long winter that difference in consumption is not trivial.
Whether it is worth the effort depends on how exposed the yard is more than on the calendar. A hive tucked behind a fence in a suburban backyard sees a different wind than one standing alone at the edge of a field. Our winter wrap comparison goes through tar paper, foam board and slip-on jackets in detail.
Best for Exposed Yards in Long Cold Winters
A slip-on insulated jacket sized to your stack goes on in one piece and comes off in one piece, which matters when you are working in a cold wind.
Comparing the Common Setups
None of these are exclusive, and plenty of backyard keepers run two or three together. The table sorts them by what each one is actually solving.
| Setup | What it solves | Best suited to | Watch out for |
|---|---|---|---|
| Rigid foam above the inner cover | Warms the ceiling so vapor does not condense there | Almost every climate, as a first step | Blocking an upper entrance or leaving gaps at the edges |
| Insulated inner cover or lid | Same as above, in one purpose built part | Keepers who want fewer loose pieces | Check it fits your box footprint, eight or ten frame |
| Quilt box with shavings | Absorbs and releases moisture | Damp, coastal and variable winters | Saturated material that stops drying out |
| Vented inner cover | Lets humid air escape upward | Mild climates, or paired with top insulation | Too much venting bleeds heat with the vapor |
| Slip-on insulated wrap | Windbreak plus slower heat loss | Exposed yards, long winters | Sizing to the boxes you actually run |
| Sealing every gap | Nothing useful | Nobody | Traps the vapor that causes the problem |
Can You Insulate Too Much?
Yes, in two ways. A hive kept unusually warm can encourage a colony to expand its brood nest earlier than the local forage supports, which increases food consumption at the worst time of year. And insulation that seals rather than shelters removes the vapor path, which returns you to the original problem with extra steps.
The practical version: insulate the top generously, keep one small upper opening or an absorbent layer, and treat the sides as a windbreak rather than a thermos. Extension or state apiarist guidance beats any national rule of thumb.
Mistakes That Turn Insulation Into a Problem
The classic error is a full wrap with no vent, which produces a hive that is measurably warmer and thoroughly wet. Close behind it is insulating a colony that was never going to make it anyway, because the mite load or the stores were wrong back in September, which is the point of doing winter prep in order.
Two smaller ones: insulating material stored outdoors goes into the hive already damp, and foam board cut slightly small leaves an air gap at the edges that becomes the new coldest surface.
Frequently Asked Questions
Do beehives need insulation in winter? It depends on climate and exposure. In long cold winters most backyard keepers insulate above the cluster at minimum. In mild regions, many skip insulation entirely and concentrate on stores and moisture. In every climate, condensation control matters more than raw warmth.
Should I insulate the top or the sides of a beehive? Top first. The lid is where warm humid air meets the coldest surface and condenses onto the bees. Side insulation is mainly a windbreak and a way to reduce heat loss, useful but secondary.
Is a quilt box better than a vented inner cover? They solve the same problem differently. A quilt absorbs moisture and releases it slowly, a vent moves humid air straight out along with some heat. Wet climates tend to favor quilts, drier and milder ones often do fine with a vent plus top insulation.
Can I use house insulation board in a beehive? Rigid foam board of the type sold for construction is what many keepers use above the inner cover, cut to the footprint of the box. Keep it dry, keep it out of reach so it does not get chewed, and do not let it block an upper entrance.
The Bottom Line
Insulating a beehive for winter is really a moisture project with a warmth side effect. Put the insulation above the cluster, give the vapor either a vent or something absorbent to move into, and treat side wrapping as a windbreak for exposed yards rather than a requirement. Read next: our winter wrap comparison for the sides of the hive, and what happens inside a hive in winter for what the cluster is actually doing under there.