Last updated: August 21, 2026
An extractor is the single most expensive thing in a backyard harvest, and in the first year it often sits idle because there is nothing to spin. Meanwhile the two frames that did fill are sitting in a box waiting for a decision. You do not need a centrifuge to get honey out of comb, and beekeepers were bottling honey for a very long time before anyone built one.
The method is called crush and strain, and it is exactly what the name says. You cut or scrape the comb off the frame, break it up, and let gravity separate honey from wax through a mesh. It costs almost nothing, it works with any hive, and it has one real drawback that you should understand before you commit to it.
This article contains affiliate links. If you buy through them, we may earn a commission at no extra cost to you. Learn more.
Quick Answer
How do you harvest honey without an extractor?
- Crush and strain: cut the comb off the frame, break it up in a food safe bucket, and let it drain through mesh into a second bucket.
- It suits small harvests, top bar hives and foundationless frames, where there is no wired foundation to work around anyway.
- The cost is the comb itself, which the colony then has to rebuild instead of refilling.
- You can also skip processing entirely and sell or keep the frame as cut comb honey.
Bottom line: crush and strain is the right call for a few frames or a top bar hive; an extractor earns its keep once you want the comb back.
What Crush and Strain Actually Costs You
Honey is the cheap part of a harvest. Comb is the expensive part, because a colony that gets drawn comb back can refill it during the same flow, while a colony that has to rebuild wax spends a large share of the nectar it collects doing so. Crush and strain destroys the comb every time.
That is a fair trade in some situations and a bad one in others. If you run a top bar hive, the comb is built fresh each time by design and there is nothing to preserve. If you run Langstroth supers with drawn comb you want back, an extractor pays for itself in colony productivity faster than most people expect.
What You Need Before You Start
The equipment list is short: two food safe buckets, a mesh strainer or straining bag that fits over one of them, a knife or a sturdy spoon, and somewhere warm and closed to work. A bucket with a honey gate at the bottom makes bottling far less messy, and it is the one item worth buying rather than improvising.
Everything that touches honey should be food safe and dry. Water is the enemy at this stage, because added moisture is what turns stored honey into fermenting honey, so buckets and strainers get dried properly before the comb goes anywhere near them.

The Method, Step by Step
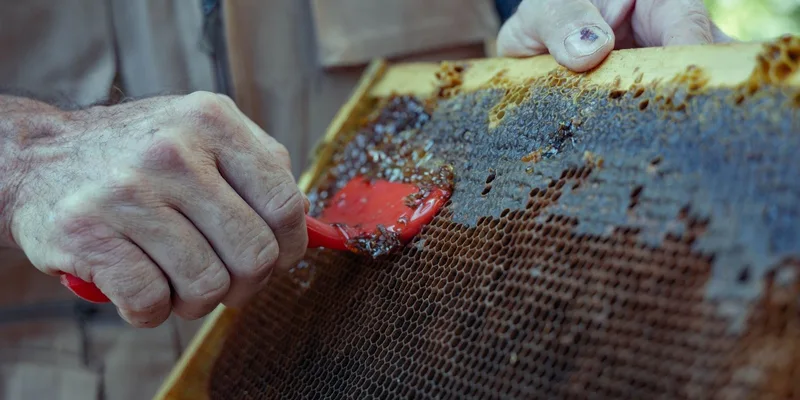
Work indoors with the door shut. Cut the comb off the frame or top bar into a clean bucket, running the knife along the wood so the comb comes away in one piece. If the frame has wired foundation you plan to keep, scrape only the comb above it, though in practice crush and strain suits frames you are not preserving.
Then break the comb up thoroughly with a clean potato masher, a large spoon or your hands, until every cell is opened. Tip the mash into a strainer or straining bag set over the second bucket, cover it against bees and dust, and leave it somewhere warm to drain. Gravity does the rest over several hours or overnight.
Straining Twice Beats Straining Once
A coarse first strain takes out the wax and any bits of comb, and a finer second pass takes out the specks. A stacked double sieve does both at once and is faster than fighting a single fine mesh that clogs. Whatever you use, cover the bucket while it drains.

Letting It Settle Before You Bottle
Fresh strained honey is full of tiny air bubbles that rise into a foam layer on top. Bottling straight away puts that foam in the jars, where it looks cloudy and separates over the following days. Letting the bucket stand covered and warm for a day or two lets the foam rise, and you skim it off before bottling.
The skimmed foam is perfectly good honey and usually gets eaten first. Bottle from the gate at the bottom rather than pouring from the top, so the clear honey goes into jars and anything floating stays behind. Our straining and bottling guide covers the sequence and how to avoid the foam in the first place.
Ways to Harvest With No Processing at All
Not every harvest needs to end in a jar. Cut comb honey is simply a square of capped comb cut from the frame and put in a container, sold and eaten wax and all. Chunk honey is a piece of comb in a jar topped up with liquid honey. Both skip the crushing entirely and are the simplest possible harvest.
| Method | Equipment | Comb after | Suits |
|---|---|---|---|
| Crush and strain | Buckets, strainer, knife | Destroyed | Few frames, top bar, foundationless |
| Cut comb | Knife and containers | Sold with the honey | Gift jars, farm stands |
| Chunk honey | Knife, jars, strained honey | Partly used | Mixed harvests |
| Extractor | Drum, uncapping tools | Returned intact | Repeat harvests, more hives |
Mistakes That Spoil the Result
Heating the honey to make it flow faster is the one to avoid. Warm is fine, hot is not, because heat changes flavor and destroys the character that makes backyard honey worth the work. Put the bucket somewhere warm and be patient instead of putting it near a heat source.
Working outdoors is the other one. Open honey in the open air brings every forager in the neighborhood, and a robbing frenzy can turn on weaker colonies in your own yard. Doors closed, supers covered, and clean up spills before you carry anything back outside.
Only Harvest Capped Honey
Uncapped cells may still be too wet, and honey bottled above its safe moisture range ferments in the jar. Bees cap a cell when the honey is ready, so harvest capped frames, and check with a refractometer if you are unsure. It is the one check that stops a whole harvest going sour months later.
Frequently Asked Questions
Does crush and strain hurt the honey? No. The honey is unheated and unfiltered beyond a mesh, which many people prefer. What it costs is the wax comb, not the quality of what ends up in the jar.
How long does draining take? Usually several hours to overnight in a warm room. Cool honey drains slowly, so a warm space matters more than a fine strainer for getting it finished.
Can I do this with a Langstroth hive? Yes, though you lose the drawn comb, which is the main reason Langstroth keepers buy an extractor. It works well for a first small harvest or for frames you were going to cull anyway.
What do I do with the crushed wax? Let it drain fully, then render it. Cappings and comb wax melt down into clean beeswax for candles and wraps, covered in our guide to rendering beeswax.
Can I use a cheesecloth? Yes, though it clogs quickly and tears when wet. A nylon straining bag or a stacked stainless sieve is easier to handle and far easier to clean afterward.
Is honey from crush and strain still raw? If you never heat it, yes. It is strained rather than filtered, so it keeps the pollen and fine particles that many buyers of local honey are specifically looking for.
The Bottom Line
Crush and strain gets honey out of comb with two buckets and a mesh, and it is the right answer for a few frames, for a top bar hive, or for a first harvest where an extractor makes no sense yet. Just be clear about the trade: you are spending comb to save equipment. When the harvest grows, or when you want the drawn comb back on the hive, the honey extractor guide covers the step up, and the straining and bottling guide handles everything after the drip.