Last updated: August 21, 2026
Starting beekeeping is less about learning bees and more about getting a sequence right. The gear is easy to buy, the bees are not easy to buy late, and the two facts together explain why so many first seasons feel rushed. People order equipment in March, discover that local bee suppliers took orders in December, and end up chasing a package from four states away.
This walkthrough puts the steps in the order they actually have to happen for a backyard start with one or two colonies. It assumes no equipment, no bees and no club membership, which is where nearly everyone begins.
This article contains affiliate links. If you buy through them, we may earn a commission at no extra cost to you. Learn more.
Quick Answer
How do you start beekeeping in a backyard?
- Check your state and county rules first, then join a local club, because both shape everything after.
- Order bees in winter for spring delivery; suppliers sell out long before the weather turns.
- Buy and assemble the hive, protective clothing, a smoker and a hive tool while you wait.
- Install the colony in spring, then inspect roughly every other week and start monitoring mites in the first summer.
Bottom line: bees get ordered first, gear second, and the first season is about learning to read frames rather than harvesting honey.
The Order Things Have to Happen In
The sequence that works is rules, club, bees, gear, site, install. Most people reverse the first three and buy a hive before they know whether a local supplier can even sell them a colony. Getting the order right costs nothing and removes the two failure modes that ruin a first season, which are late bees and a site you have to move.
Everything on the list happens between roughly November and April in most of the country. If you are reading this in June, the realistic plan is to spend the summer learning and ordering for next spring, or to look for a late season nuc through a club.
Step One: Find Out Who Decides in Your Area
Whether you can keep bees, how many colonies, how close to a property line, and whether you have to register them varies by state, by county, by city and sometimes by homeowners association. There is no national rule and no number worth quoting, because the one that applies to you is local.
The two reliable places to ask are your state apiarist, who handles apiary registration and inspection in most states, and your county or city zoning office. If you have an HOA, the governing documents are the third document to read. Our guide to who decides the rules in your state covers how to find each of those without guessing.
Step Two: Join a Local Club Before You Buy Anything
A local beekeeping association is the single highest value thing on this list and usually the cheapest. Clubs run beginner courses in winter, know which suppliers deliver healthy bees locally, often organize group orders, and give you people to call in June when something looks wrong in a frame and you cannot tell what.
Clubs also tell you what equipment the area runs, which quietly decides your hive choice. If everyone within an hour keeps ten frame Langstroth hives, that is what nucs will fit and what spare boxes will turn up secondhand. Our first hive guide covers why that compatibility matters more than any design feature.
Step Three: Order the Bees
Bees are the bottleneck. Packages and nucs are typically ordered between late fall and midwinter for pickup or delivery in April or May, and good local suppliers sell out early. Order before the equipment, because the delivery date sets your whole build schedule.
Package or Nuc
A package is a screened box of loose bees with a caged queen, shaken from other colonies and shipped without comb. A nuc is a small working colony on five frames, with a laying queen, brood and stores already in place. Nucs start faster and cost more, packages are more widely available and need more feeding.
Both work for a first colony, and the choice usually comes down to what your local supplier actually has. Our comparison of packages and nucs covers the timing and risk differences in detail.
Step Four: Buy and Build the Equipment
With a delivery date in hand, the gear list becomes concrete. A first colony needs a complete hive with two brood boxes, protective clothing that fits, a smoker with fuel, a hive tool, a feeder and something to monitor mites with. Flat pack woodenware needs an evening with glue and a mallet before the bees arrive.
Clothing First, Because It Decides Your Confidence
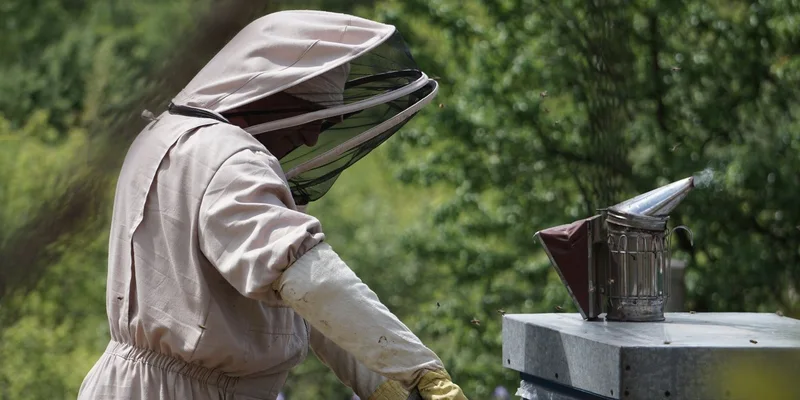
The suit is the piece that determines whether you open the hive on a warm afternoon or find a reason not to. A ventilated three layer suit breathes far better than a single layer cotton one and is sting resistant rather than sting free, which is the honest way to describe every suit on the market.

A Smoker That Stays Lit
Smoke calms a colony by interrupting alarm signals, and a smoker that dies halfway through a first inspection turns a calm hive into a hurried one. A larger firebox with a heat shield holds enough fuel to outlast a beginner working slowly through ten frames.

One Hive Tool, Then a Second
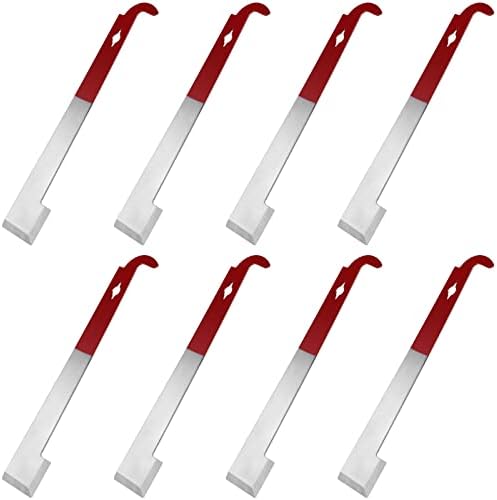
Frames get glued in place with propolis, and fingers do not lift them. A J hook style tool lifts frames from underneath as well as prying boxes apart, which is why most keepers end up preferring it. Buy two, because the first one gets set down in the grass and disappears.
Step Five: Choose the Spot
A good backyard hive site gets morning sun, has a windbreak behind it, sits on a level stand off the ground, and faces its entrance away from paths, patios and the neighbor’s yard. Bees fly up over a fence or hedge placed a few feet in front of the entrance, which keeps their flight path above head height.
Water matters more than most beginners expect. A colony that finds no water at home will use the nearest source, which is often a neighbor’s pool. Putting a shallow water source with landing surfaces in your own yard before the bees arrive settles that early. Our guide to placing a hive in a backyard covers the whole checklist.
Step Six: Installation and the First Season
Installation day is short. A nuc is transferred frame by frame into the waiting deep box in the same order it came out. A package is shaken or poured in with the queen cage suspended between frames so the colony can release her over the following days. Both happen in late afternoon, in calm weather, with the feeder on immediately.
After that the rhythm is roughly an inspection every week or two while the colony builds, keeping syrup available on undrawn comb, watching for the queen to start laying, and adding the second brood box when the first is mostly drawn. Our ten minute inspection checklist covers what to actually look at once the lid is off.
A Realistic First Year Timeline
The table sketches the normal shape of a first year for a spring installed colony in most of the country. Local climate shifts everything by weeks in either direction, so treat it as a sequence rather than a calendar.
| Period | What you do | What the colony does | Common mistake |
|---|---|---|---|
| Late fall to winter | Rules, club, order bees, order gear | Nothing yet | Ordering bees too late |
| Late winter | Assemble and paint, set the stand | Nothing yet | Leaving assembly to install week |
| Spring | Install, feed, inspect every week or two | Draws comb, queen starts laying | Opening the hive too often |
| Summer | Monitor mites, add space, watch for swarming | Builds population and stores | Skipping mite counts |
| Fall to winter | Assess stores, winterize, leave it alone | Clusters and overwinters | Expecting a first year harvest |
What the First Year Really Asks of You
Time, mostly in small amounts. An inspection of one hive takes roughly ten minutes once you know what you are looking at, and longer than that while you are learning. Every other week through spring and early summer is a normal cadence, plus a few longer afternoons for assembly, feeding and winter preparation.
Expectations are the other adjustment. A colony that spends its first season drawing comb and filling boxes for winter has succeeded, even if nothing goes in a jar. Our honest look at what beekeeping costs to start and keep going and at the mistakes that kill first colonies both start from that point.
Frequently Asked Questions
When should you start beekeeping? The learning starts in fall or winter and the bees arrive in spring. Order a package or nuc between late fall and midwinter, use the remaining weeks to assemble equipment, and install in April or May depending on your climate.
Do I need a permit to keep bees in my backyard? That depends entirely on your state, county, city and any homeowners association. Some places require registration of colonies, others do not regulate backyard hives at all. Ask your state apiarist and your county office rather than relying on anything you read online.
How much space does a beehive need? Less than most people picture. A hive needs a level stand, room to stand behind and beside it while working, and a clear flight path in front. A modest suburban yard usually accommodates one or two hives without difficulty.
Can I start beekeeping with no experience at all? Yes, and most people do. A winter beginner course through a local club, a mentor to call, and a willingness to be wrong in front of a frame cover the gap faster than reading alone. Our first twelve months guide lays out what the year looks like.
Will my bees bother the neighbors? Usually not if the entrance faces away from shared spaces, a hedge or fence lifts the flight path, and water is available in your own yard. A jar of honey and a heads up conversation before the bees arrive does more for neighbor relations than anything else.
How much honey will I get the first year? Often none. A colony starting on bare foundation uses its first season to build comb and store food for winter. Treat any first year surplus as unexpected rather than as the plan.
The Bottom Line
Starting beekeeping in a backyard is a sequence: check the local rules, join a club, order bees early, buy gear against that delivery date, prepare the site, and then spend a season learning to read a colony rather than harvesting from it. Next, read what is worth buying together in a starter kit and how to choose a bee suit that you will actually wear.