Last updated: August 21, 2026
New beekeepers inspect for too long and look at too much. It is understandable: the hive is fascinating, every frame has something happening on it, and nobody wants to miss the thing that matters. But an open hive is a cold, disrupted hive, and a colony that gets a forty minute examination every weekend spends a lot of its energy repairing what you took apart.
Experienced keepers work to a shorter list. They know what four or five pieces of information they came for, they get them, and they close the box. Ten minutes per colony is a realistic target once you know the sequence, and this guide is that sequence: what to look at, in what order, and what each observation is actually telling you.
This article contains affiliate links. If you buy through them, we may earn a commission at no extra cost to you. Learn more.
Quick Answer
What do you check during a hive inspection?
- Is the colony queenright, which you answer by finding eggs rather than by finding her.
- Is the brood pattern solid, and does the brood look healthy across all stages.
- Do they have food, and do they have room, since running out of either drives the next problem.
- Are there pests or signs of disease, and what is the mite load telling you.
Bottom line: eggs, brood, food, space, pests. Answer those five and close the hive.
Before You Open the Lid
The inspection starts before the hive tool comes out. Stand off to the side of the entrance for a minute and watch. Steady traffic in and out, foragers arriving with pollen on their legs, guards behaving normally: that is a colony doing what it should, and it colors how you read everything else you see inside.
Weather is the other pre check. Inspect on a calm, warm, sunny afternoon when foragers are out, which means fewer bees at home and a colony less inclined to object. Avoid inspecting in rain, in wind, in cold, in the evening, or just before a front, all of which put the whole colony indoors and in a worse mood.
What to Have in Your Hand
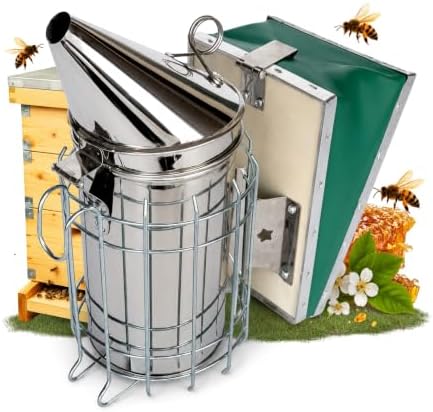
A lit smoker, a hive tool and somewhere to put the first frame you pull. If you are missing any of the three, you will improvise badly with an open hive in front of you.

The Order of Operations
Work from the outside in and from the top down. Two puffs of smoke at the entrance, wait a moment, crack the outer cover, a light puff under the inner cover, then lift it off. Give the colony a few seconds between each step rather than moving straight through, because the pause is what lets the smoke do its work.
Remove the second frame from the wall first, not the first. The outer frame is often propolized hard against the box and is the most awkward one to lift; taking the second one out gives everything else room to slide. Park it on a frame perch, then work across the box one frame at a time, sliding rather than lifting where you can.
Holding a Frame Properly
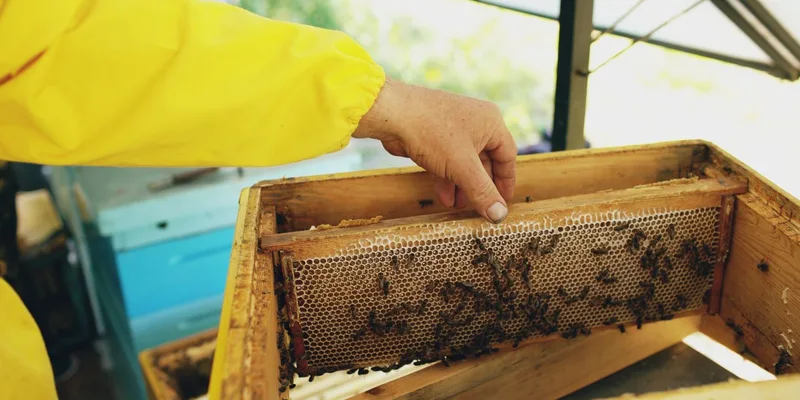
Lift the frame straight up, hold it over the open hive so anything that falls lands back home, and turn it by rotating it vertically like a page in a book rather than tipping it flat. Tipping a frame horizontally in warm weather can let fresh nectar run out of the cells and, on new comb, can break it off the foundation.
The Five Questions
Everything you are looking for fits into five questions, and most of them are answered on two or three frames in the middle of the brood nest. You do not need to inspect every frame in every box on every visit.
| Check | What good looks like | What should worry you | What to do next |
|---|---|---|---|
| Queenright | Eggs standing in cell bottoms | No eggs, or multiple eggs per cell | Recheck in a few days before acting |
| Brood pattern | Solid slab of capped brood, few gaps | Spotty pattern, sunken or perforated caps | Note it, look closer, consider disease signs |
| Food stores | Arc of honey and pollen above the brood | Bare cells around a growing brood nest | Consider feeding for the season |
| Space | Room to expand, comb being drawn | Every frame full, queen cells on the bottom bars | Add a box, or manage for swarming |
Looking for Eggs Instead of the Queen
Finding the queen is satisfying and mostly unnecessary. Eggs are the better evidence, because an egg standing upright in the bottom of a cell means a laying queen was on that comb within the last three days. That is the information you actually came for, and it is far easier to find than one bee among thousands.
Eggs are small and hard to see, so use the sun. Stand with your back to it and tilt the frame so light falls into the cells. Reading glasses help more than most people admit. If you would rather find her directly, a marked queen makes it quick, which is the argument in our queen marking guide.
Reading the Brood
Healthy brood looks uniform: pearly white larvae curled in the cells, capped brood in a solid block with a slightly domed, dry looking cap. Discolored, sunken, greasy or perforated caps are the signs keepers learn to notice. Recognition is worth learning from good photographs; what happens after a suspected notifiable brood disease is not a home decision, and the correct step is to contact your state apiarist rather than to start any treatment.
Pests, Mites and the Part People Skip
Small hive beetles running for cover when you lift a frame, wax moth trails in a weak colony, or mites visible on the backs of bees are all things you will spot with the frames in your hand. What you cannot spot by eye is the actual mite load, and that is the number that decides whether a colony makes it to spring.
Monitoring means a sample and a count, not a glance. Penn State Extension and the University of Minnesota Bee Lab both publish standard alcohol wash and sugar roll procedures, including sample size and how to interpret the result, and following one of those is worth far more than any impression you form from looking at bees. If the count points toward treatment, the product, the timing, the temperature conditions and the question of whether honey supers may be on the hive all come from the EPA registered label of the product you buy.
How Often to Monitor
More often than most backyard keepers do, and on a schedule rather than on a hunch. Your local extension service or beekeeping association publishes a monitoring calendar for your region, which is a better guide than a national average. Our mite counting guide covers what the two common methods involve in practice.
Closing Up and Writing It Down
Put the frames back in the order and orientation you found them, push them together so the bee space is correct, and set boxes down slowly with a slight sliding motion so you crush fewer bees along the rims. Scrape burr comb off the rims while you are there, since it takes seconds now and is a chore later.
Then write it down before you walk away. Date, weather, whether you saw eggs, brood pattern, stores, space, anything odd, and what you plan to do next time. A colony you inspect every two weeks is eighteen or twenty visits a season, and nobody remembers visit six by visit twelve. Notes on your phone are fine; notes you never take are the reason problems get spotted late.
Frequently Asked Questions
How often should I inspect my hive? Every one to two weeks through the active spring build up, less often in summer, and rarely in cold weather when opening the hive breaks the cluster. The habit that gets colonies into trouble is inspecting constantly in April and then not at all in August.
Do I need to see the queen every time? No. Eggs are the evidence that matters, since an upright egg in a cell bottom means she was laying within the last few days. Hunting for her on every visit adds time and disturbance for information you already have.
How long should an inspection take? Around ten minutes per colony once you know what you are looking for. Longer inspections chill brood, disrupt the nest and give robbing a window, particularly during a dearth.
What time of day is best? Mid morning to mid afternoon on a warm, calm, sunny day, when most foragers are out of the hive. Avoid rain, wind, cold and dusk, and avoid opening a hive right before a weather front arrives.
Do I need to inspect every frame? Not usually. Two or three frames from the center of the brood nest answer most questions. Full frame by frame inspections have their place, for example when you are hunting a specific problem, but they are not a routine requirement.
What if the colony is aggressive during inspection? Close up and come back on a better day. Colonies get defensive during dearths, after queen loss and in poor weather. If defensiveness persists across good conditions, that is a conversation for your local club or mentor. Any whole body reaction to a sting is a 911 call, not something to look up.
The Bottom Line
A good inspection is short, ordered and specific. Watch the entrance, smoke lightly, pull the second frame first, and answer five questions: eggs, brood, food, space, pests. Write it down, close up, and let them get on with it. The two purchases that make this routine work are covered in our smoker buying guide and our hive tool guide, and the mite side is in the mite counting guide.