Last updated: August 21, 2026
After a harvest you are left with a bucket of cappings that is half wax, half honey and entirely sticky, plus whatever burr comb came off the frames. Most first-year beekeepers freeze it, mean to deal with it, and find it again the following June with wax moths living in it. Rendering is the step that turns that mess into clean blocks you can actually use or trade.
The process itself is simple and the mistakes are expensive: scorched wax that never recovers its color, a ruined pan, or a kitchen fire. This guide covers the three methods backyard beekeepers actually use, how to filter properly, and the one rule that applies to all of them regardless of scale.
This article contains affiliate links. If you buy through them, we may earn a commission at no extra cost to you. Learn more.
Quick Answer
How do you render beeswax?
- Rinse the honey out of the cappings first, then melt the wax with gentle, indirect heat.
- Use a solar melter, a double boiler or a slow cooker. Never put wax over direct flame or a bare burner.
- Strain the molten wax through cloth into a mold, let it set, and scrape the debris layer off the bottom of the block.
- Repeat the melt and strain once or twice for candle-grade wax.
Bottom line: indirect heat and a good filter do all the work. Beeswax is flammable, so heat is the part to respect.
Start by Getting the Honey Out
Cappings straight from the uncapping tank are loaded with honey, and honey does not melt out of wax, it burns and darkens it. Let the cappings drain thoroughly first, then rinse them in cool or lukewarm water until the water runs clear and the wax feels waxy rather than tacky.
Do not throw the drainings away without thinking. Honey rinsed off cappings is fine for feeding back to your own colonies but it is not table honey, and it is not something to hand around. If you have not drained the cappings yet, our uncapping tank guide covers the equipment that separates the two before this step even starts.
The One Rule: Indirect Heat, Always
Beeswax is flammable and it melts at a temperature well below the point where it will scorch, so every established rendering method is built around gentle, indirect heat. Published guidance from beekeeping suppliers and extension sources is consistent on this: never melt wax over an open flame or directly on a burner.
Practically, that means water between the heat and the wax, or the sun doing the work. Beeswax is commonly cited as melting in the region of 145 degrees Fahrenheit, which is comfortably below boiling water, so a pot of simmering water is more than enough heat and gives you a built-in ceiling.
Dedicated Equipment, Not Kitchen Equipment
Wax coats everything it touches and does not wash off in a dishwasher. Whatever pot, spoon, strainer and mold you use for wax becomes wax equipment permanently, so buy cheap, buy dedicated, and keep it in the same bin as the rest of your harvest gear.
Wax also floats and sets in drain traps. Never pour rinse water or melt residue down a sink; let it set in a bucket and lift the disc off the top instead.
Method One: The Solar Melter
A solar melter is an insulated box with a dark interior and a glass lid that traps enough sun to melt wax passively. Cappings go in on a screen or in a pan, the wax runs down and drips into a collection tray, and the slumgum, the dark residue of cocoons, larval skins and hive debris, stays behind on the screen.
The appeal is that it costs nothing to run, needs no supervision and does the first filtering stage for you by gravity. The drawbacks are equally obvious: it works only on hot, sunny days, it is slow, and it leaves some wax behind in the residue. For a backyard operation processing cappings from a few hives, that is usually an acceptable trade.
Method Two: The Double Boiler
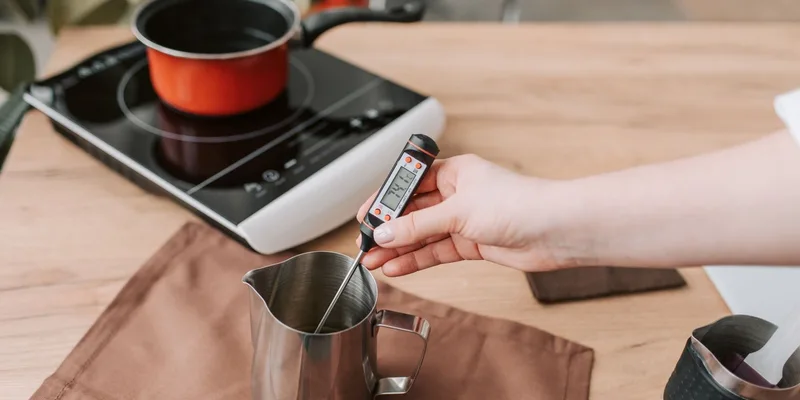
A double boiler is the controllable option and the one to use when you want candle-grade wax on a schedule. Water in the outer pot, wax in the inner, heat under the water only. The water temperature caps the wax temperature, which is exactly the safety margin you want with a flammable material.
A slow cooker with a water bath works the same way and has the advantage of a thermostat and a lid. Either way, keep the wax covered while it melts to limit splashing, and never walk away from it, because an empty outer pot removes the entire safety mechanism you built the setup around.

Filtering: Where the Quality Comes From
Molten wax carries fine debris that will not settle out in the time it takes to cool. Pouring through a filter is what separates a block you would put in a candle from a block you would use to wax a saw blade. Cloth is the standard medium: cheesecloth doubled over for a first pass, then a finer weave for the second.
Filter while the wax is properly liquid, since it thickens fast in a cool room and will clog a fine cloth before it drains. And filter into a warm mold rather than a cold one, which slows cooling and helps the last of the fine debris settle to the bottom of the block where you can scrape it off.

The Three Methods Compared
Choose by how much wax you have, how fast you need it, and how clean the result has to be.
| Method | Speed and control | Cleanliness of output | Best for |
|---|---|---|---|
| Solar melter | Slow, weather dependent | Good first pass, some wax left behind | Bulk cappings, no supervision |
| Double boiler | Fast, fully controllable | Excellent with two filter passes | Candle and cosmetic grade wax |
| Slow cooker with water | Slow but thermostatted | Very good, easy to repeat | Small batches, hands off |
| Direct heat on a burner | Not applicable | Not applicable | Do not do it |
Storing the Blocks and What to Do With Them
Let the block set fully, then turn it over and scrape the dark layer off the bottom with a knife. Store finished blocks wrapped or boxed, away from light and away from anywhere a wax moth could reach, since moths will find stored comb debris even when they ignore clean wax.
From there the obvious use is candles, which is the one project where the second filter pass genuinely shows. Our guide to candles from your own cappings covers molds, wick sizing and the mistakes that produce a tunneling candle, and the harvest equipment guide covers where rendering sits in the rest of the season.
Frequently Asked Questions
Can I melt beeswax directly in a pan? No. Beeswax is flammable, and standard guidance is to use indirect heat only, meaning a double boiler, a water bath, a slow cooker or a solar melter rather than a bare burner or open flame.
Do I have to wash cappings before rendering? Yes, drain and rinse them. Residual honey scorches and darkens the wax, and it makes filtering slower and messier than it needs to be.
What is slumgum? The dark residue left after rendering: cocoons, larval skins, propolis and general hive debris held together by the last of the wax. It is not usable wax and is normally discarded or composted.
How many times should I filter? Once for utility wax, twice or more for candles and anything where color and clarity matter. Each pass through a finer cloth removes another grade of fine particles.
Will old brood comb render into good wax? It renders, but it yields much less wax per pound and produces a darker block with far more slumgum than cappings do. Keep cappings and brood comb in separate batches.
Can I pour the rinse water down the drain? No. Wax sets in traps and pipes. Let it cool in a bucket, lift the wax disc off the surface, and dispose of the water afterward.
The Bottom Line
Rendering beeswax comes down to draining the honey out, melting with indirect heat, and filtering more than you think you need to. A solar melter handles bulk cappings for free, a double boiler gives you control when you want candle-grade blocks, and nothing goes over a bare flame. Next stops: candles from your own cappings and, further upstream, uncapping frames without wrecking the comb.